Adding Issue Template
An issue template is a template with prepopulated information about how an issue can be mentioned.
Step by step process to create an issue template :
Step 1 :
You should have a repository.
Step 2 :
Go to the main page of the repository. Under the repository name, click Settings.

Step 3 :
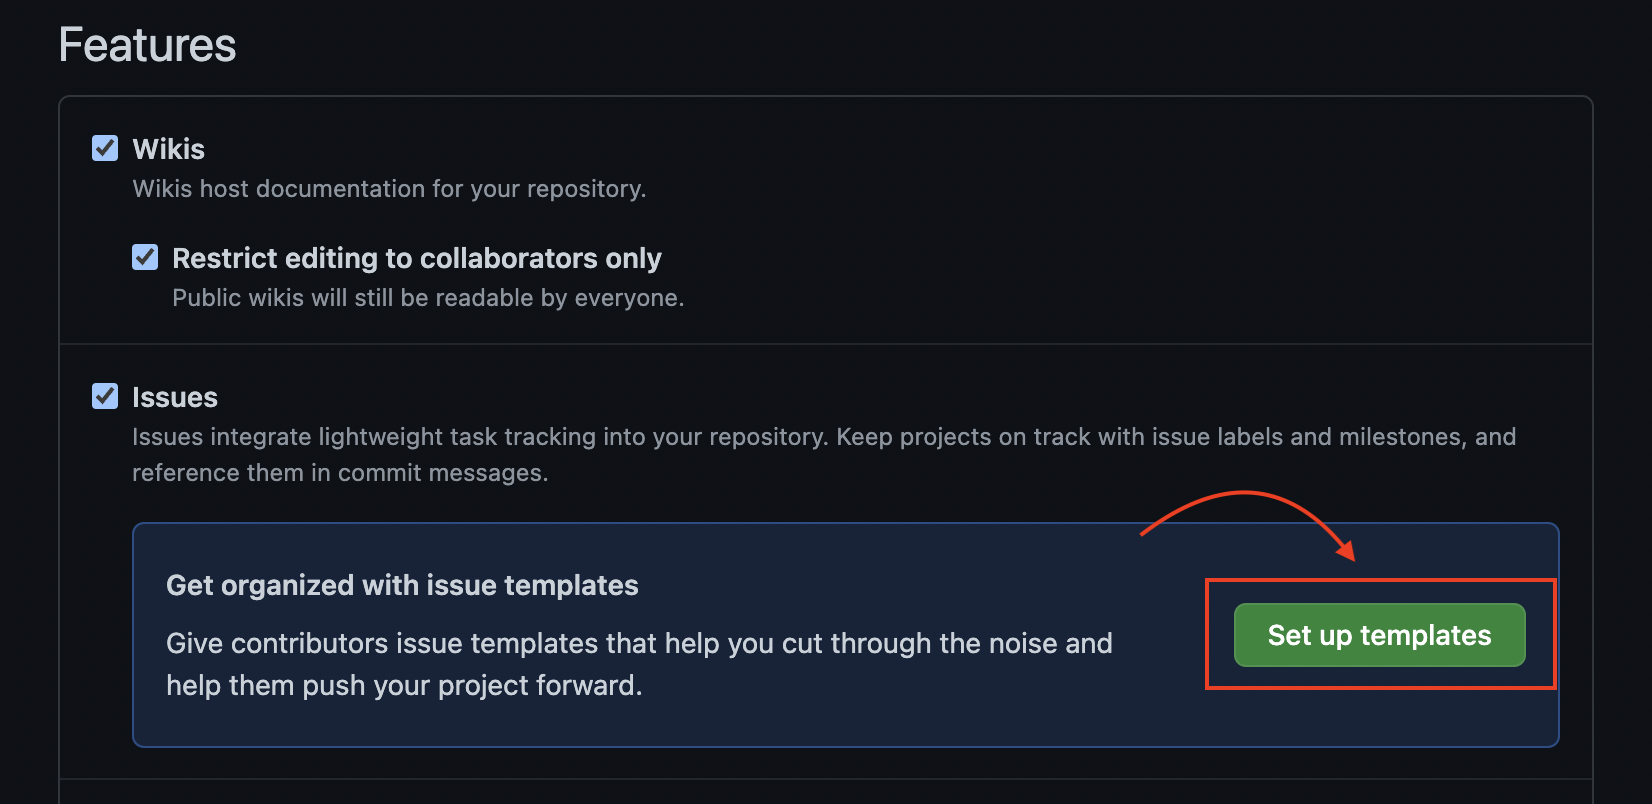
Scroll down to the "Features" section. Under "Issues", click on "Set up templates".
Step 4 :
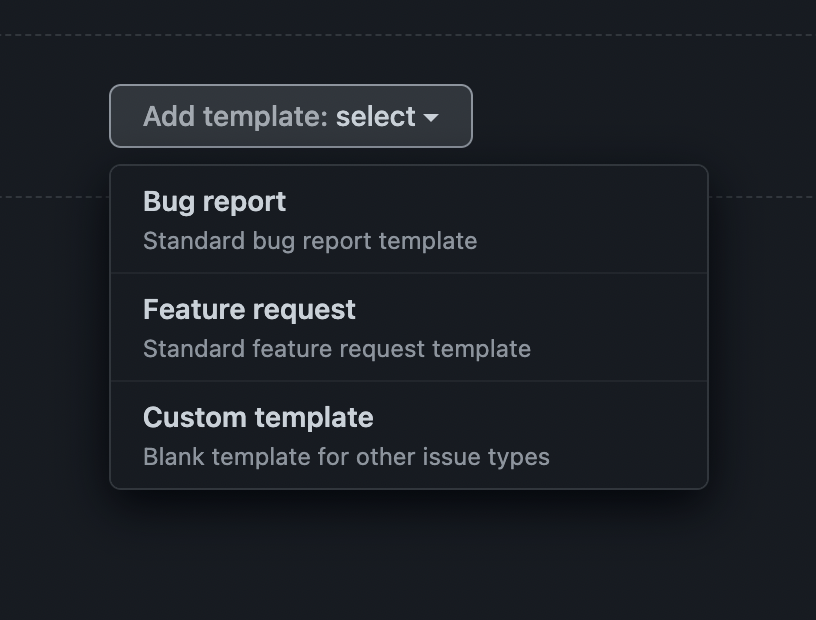
Click on the Add template drop-down menu, and select the type of template you'd like to create
- Bug report - This template is used to convey the detailed information about the bug to the developers.
- Feature request - It is a document where developers make requests for a product in development.
- Custom template - This template is completely user controlled and can be customized according to needs.
Step 5 :
You can click on Preview and edit to view and edit the template.

Step 6 :
Click on the pencil icon to edit the template and type in the fields to edit their contents.

Step 7 :
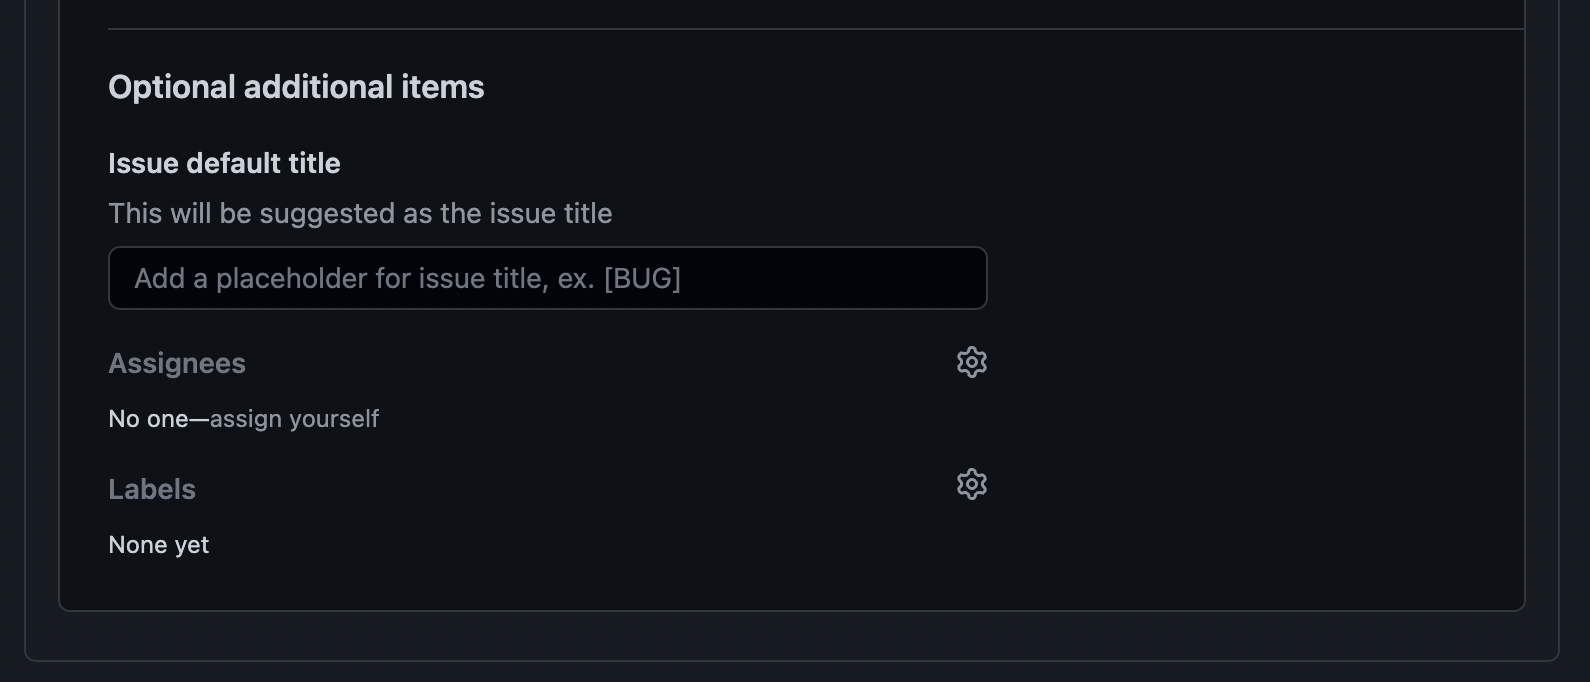
Enter the information under "Optional additional information" to automatically set a default issue title, assign the issue to users with read access to the repository, or apply labels to your issue template. In a YAML format, you can also include these details in the issue template along with the title, labels, or assignees.
Step 8 :
Click on Propose changes in the top right corner of the page once you're done altering and previewing your template.

Step 9 :
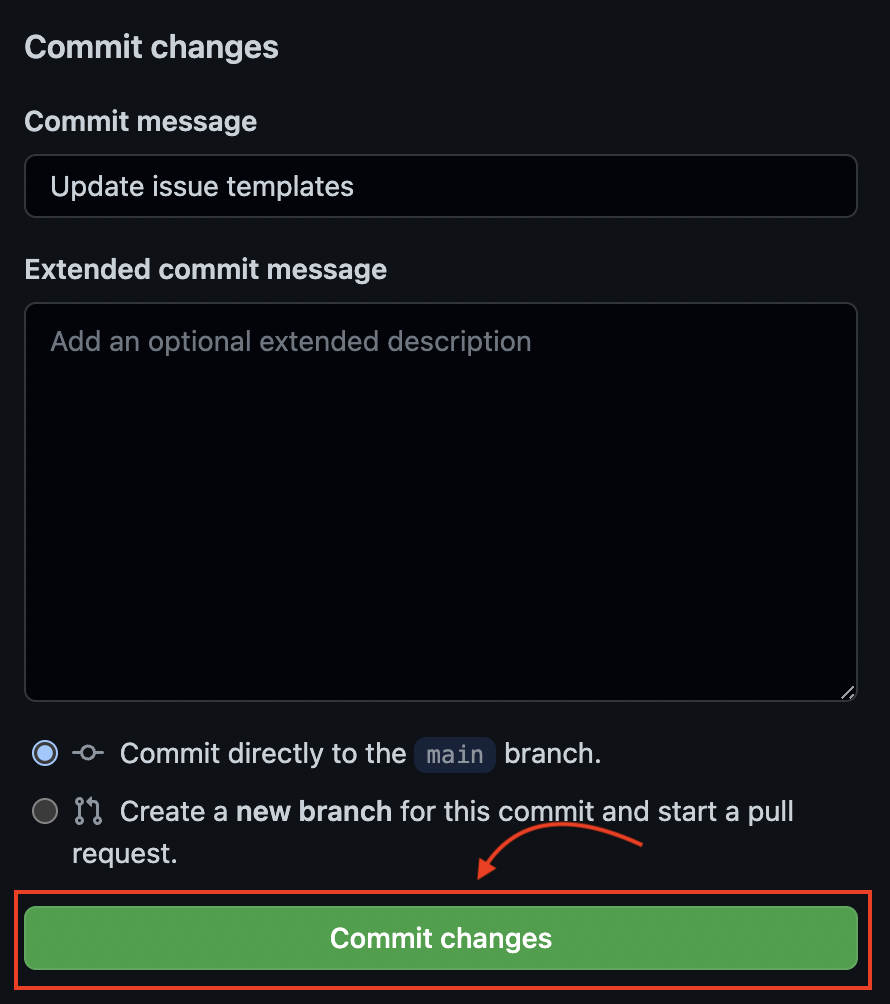
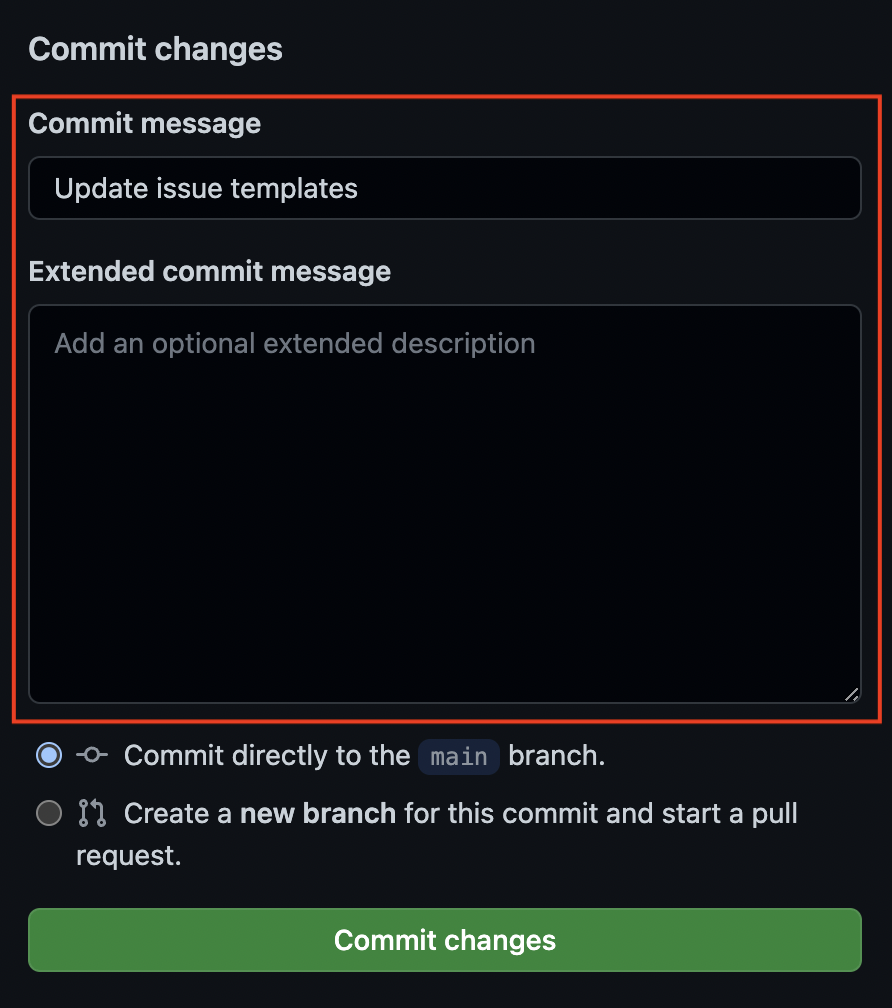
Write a commit message summarizing the changes you made.
Step 10 :
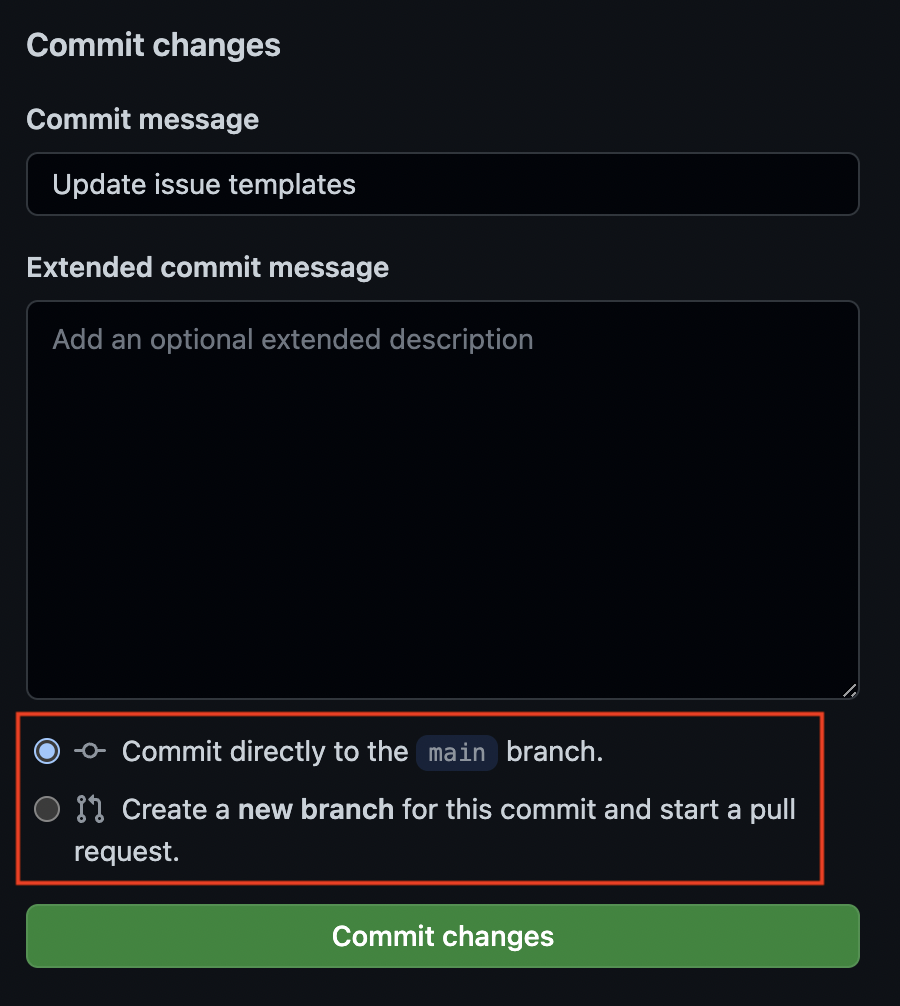
Choose whether to establish a new branch and launch a pull request or to commit your template directly to the default branch underneath the commit message boxes.
Step 11 :
Click on Commit changes. The template will be accessible for contributors to use when they open new issues in the repository once these modifications are merged into the default branch.
