Creating and assigning an issue from a repository
There are multiple ways to create an issue on a GitHub repository, but for beginners, the best way to create an issue is by creating an issue from the repository on the GitHub website.
Step 1
Navigate to the main repository. Underneath the repository title, you will find a tab called "Issues". Click on that to reach the list of issues for the repository.

(Issues tab window below)
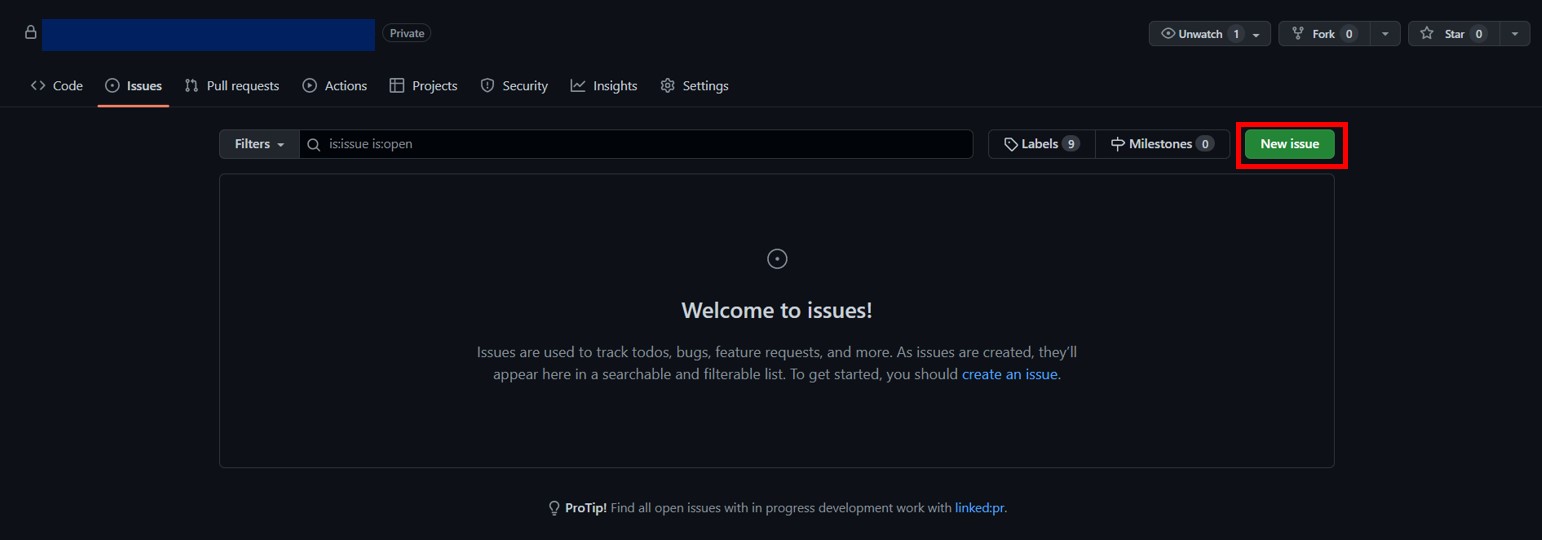
Step 2
Click on the "New Issue" button. When the new blank issue creation section pops up, add a title pertaining to what your issue is.
NOTE: For some projects, there would be specific issue templates that pop up, such as a "Bug report" or "Feature request". If such an option exists, you can click on the kind of issue you have, or you can create a blank issue if the type of issue you have isn't available.

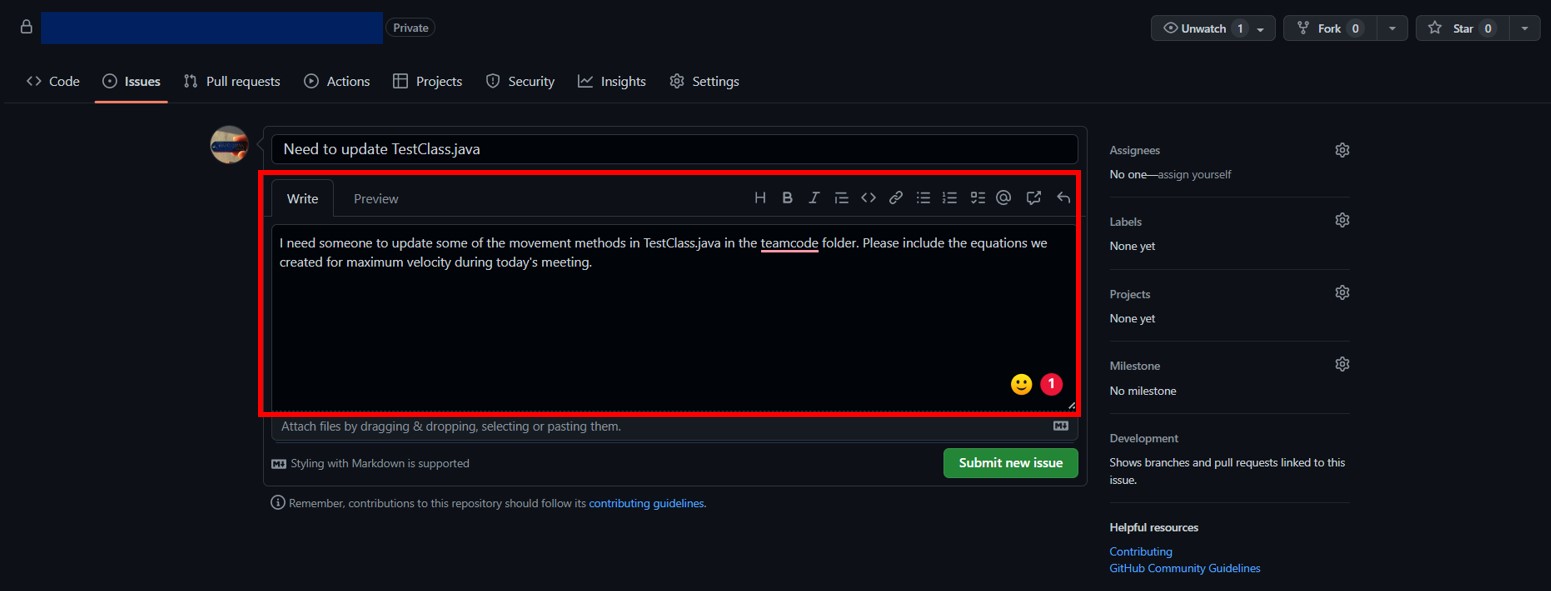
Step 3
In the comment section, write about your issue and what needs to be solved. Add necessary files to show the issues more clearly.
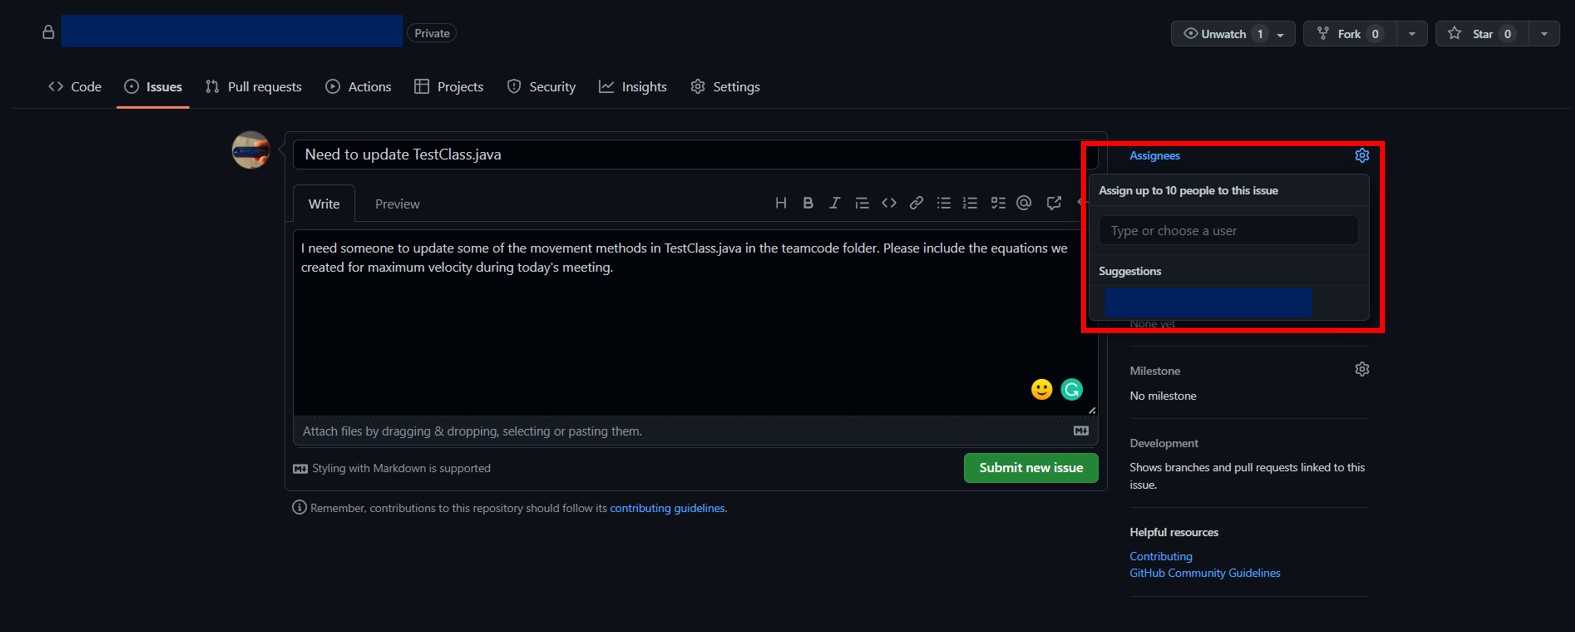
Step 4
If needed, we can assign someone to work on the identified issue by clicking the assignees button on the right side of the window and entering the user(s) to be assigned (You can have up to 10 people assigned on an issue).
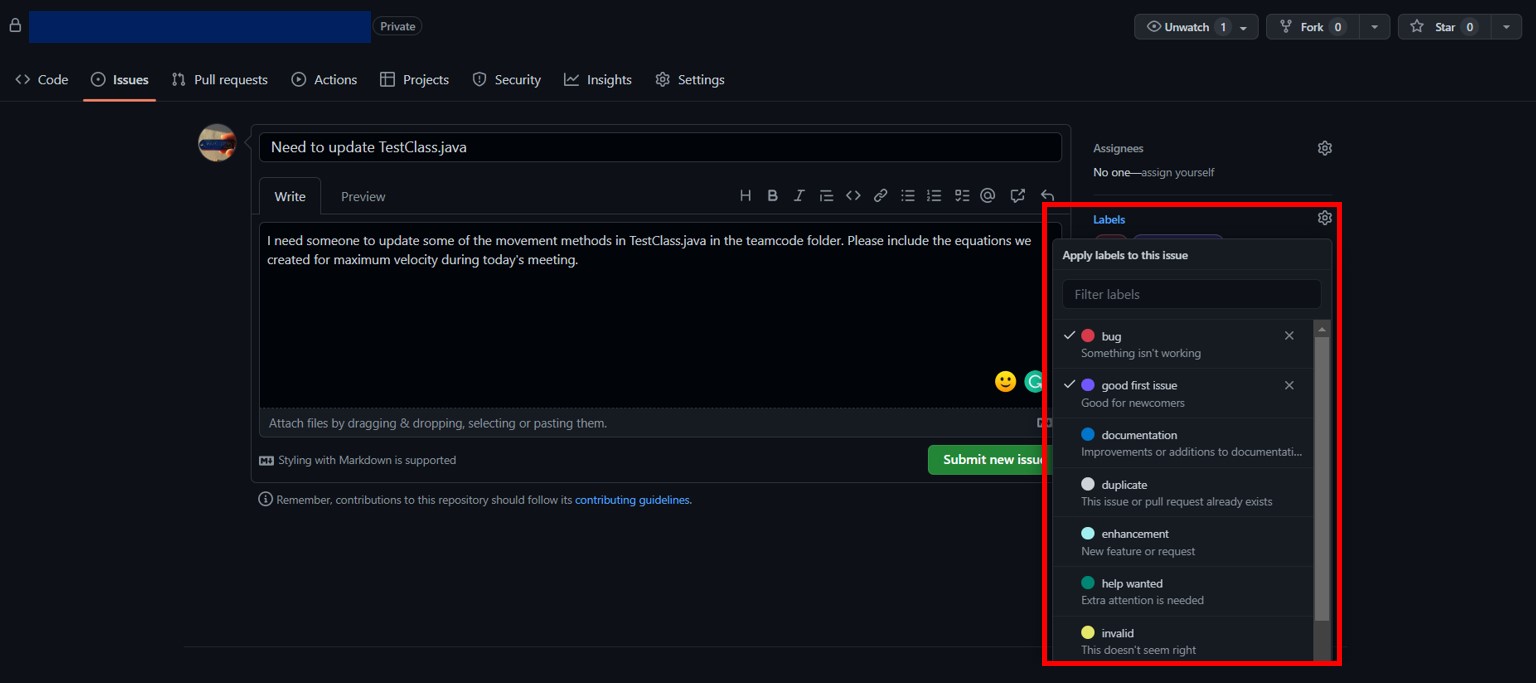
Step 5
If needed, we can assign labels to the issue. For example, an issue talking about a bug in the code could use a "Bug" label, and an issue that is beginner friendly can use a "good first issue" label. This would help the issue attract people who would be a good fit for solving the issue, such as first-time contributors or bug solvers.
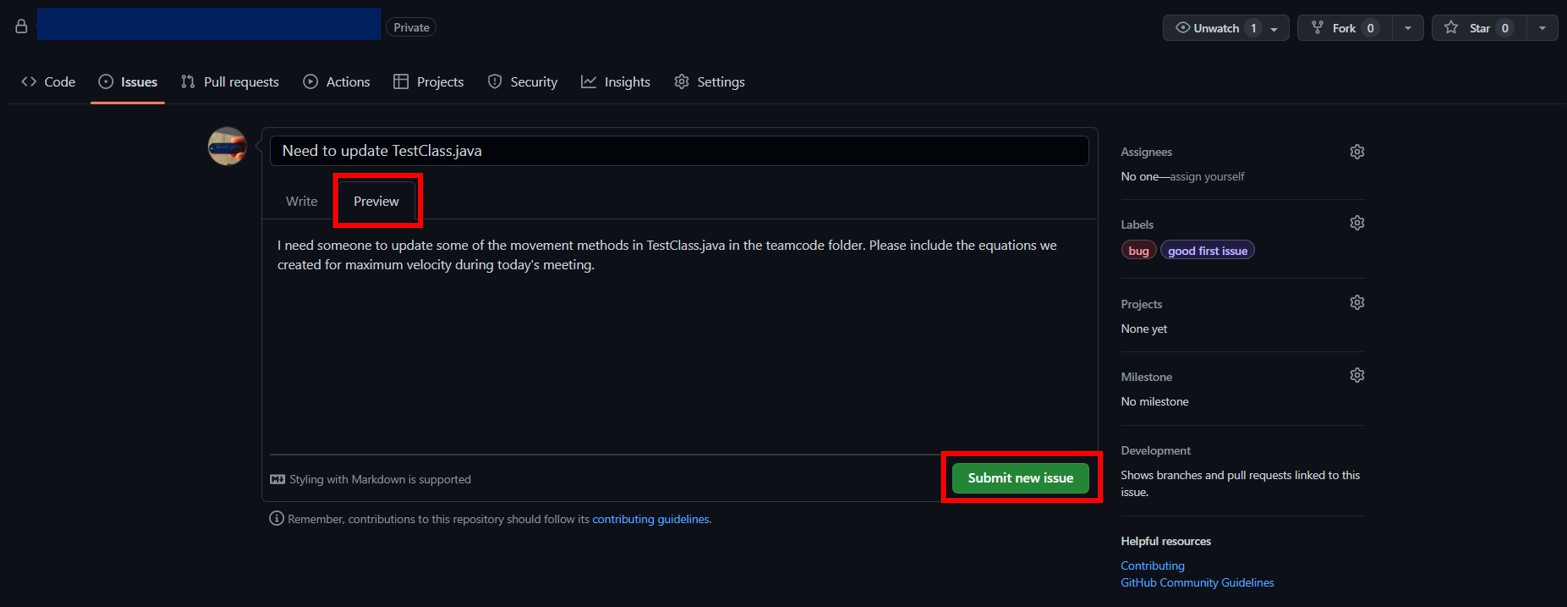
Step 6
Click the preview tab to see how your issue would look. If you are satisfied with how the issue is conveyed, click "Submit new issue"!