Creating a Project Board
Project Board
A project board is a collection of issues and pull requests associated with a repository. You can use project boards to create customized workflows tailored to your needs. For example, you can create a project board for bug triage, for onboarding new members to your team, or for tracking customer support requests.
Creating a Project Board
-
Navigate to the repository where you want to create a project board. Click on the Projects tab on the top of the page. If you don't see the Projects tab, click on the Code tab and then click on the Projects tab.
-
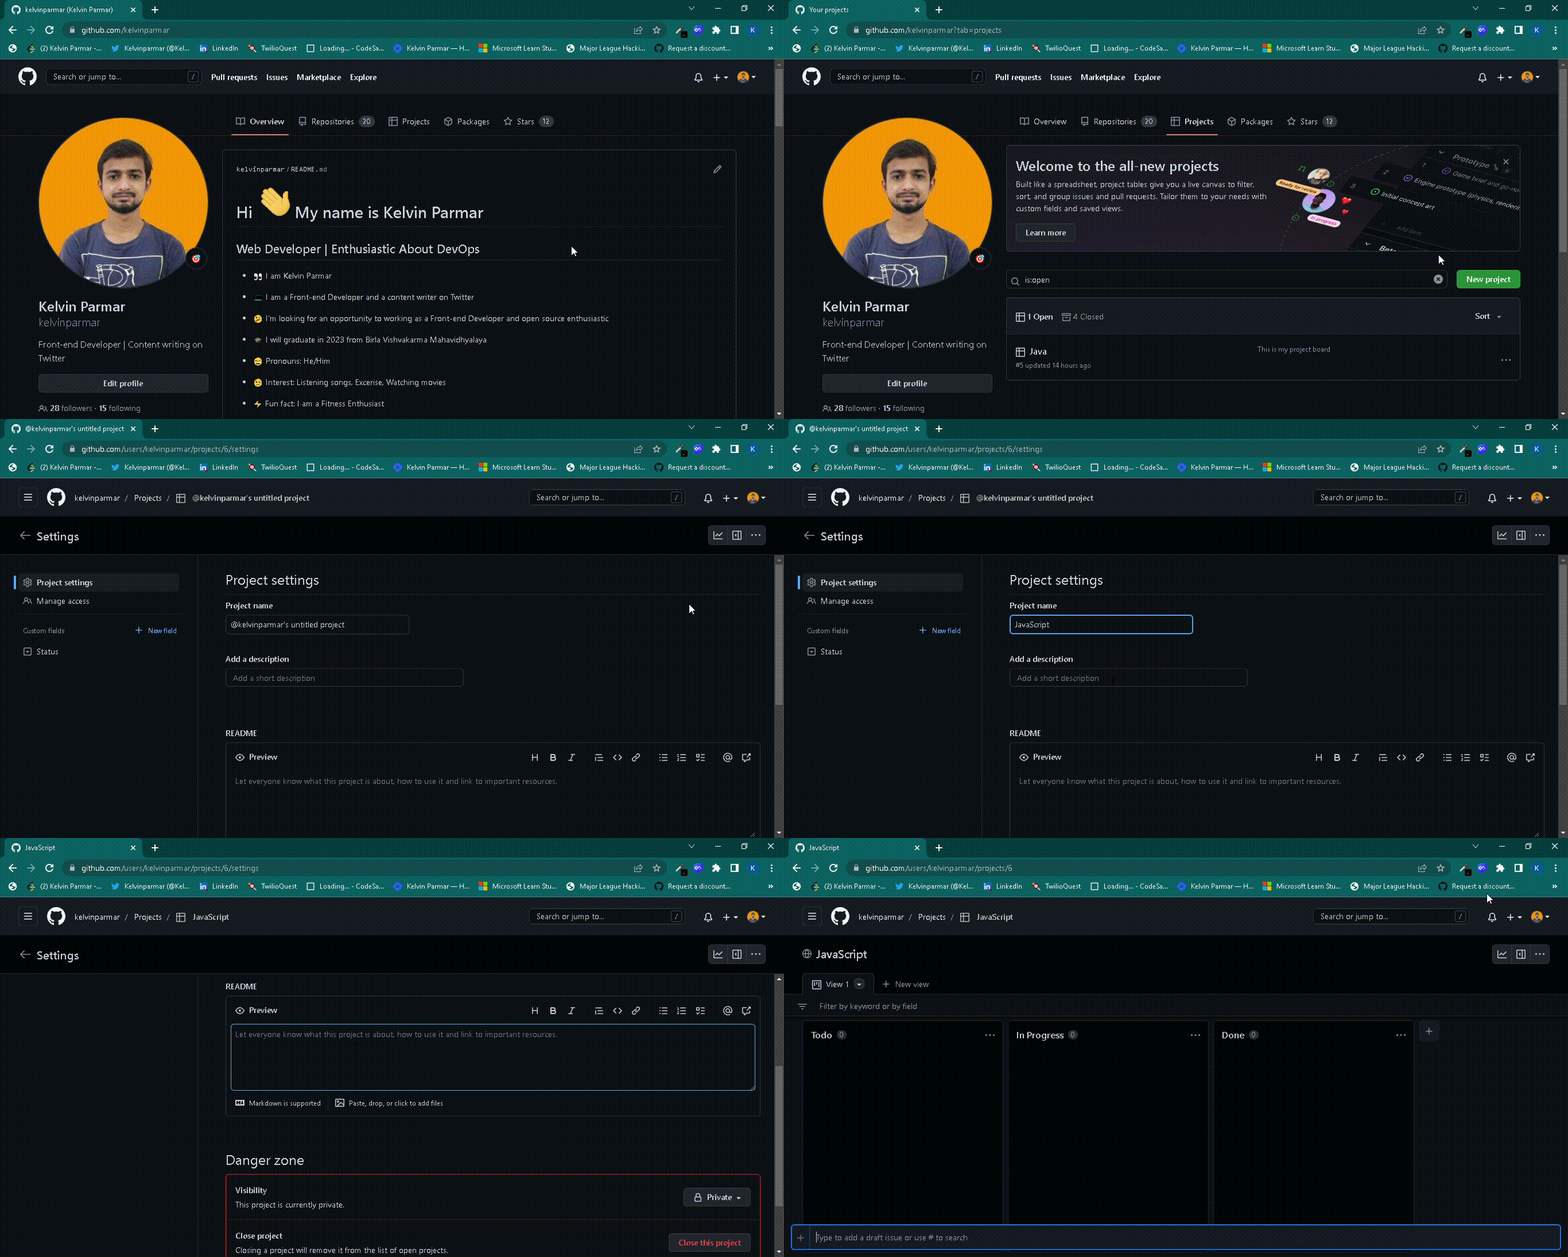
Click the Projects tab. You will see a list of all the project boards that you have created. If you will not find then click on Add Project tab and in that choose Go to your profile to create a new project Click on the New Project button.
-
Click Create a project. You will be redirected to a page where you can create a new project board.
-
Select a template for your project board. You can choose to create a blank project board or select from a set of pre-configured templates. Click Create project.
-
Enter a name for your project board. You can also add a description and a link to the project board. And also ypu can add a Readme file in your Project board. So now your project board is ready to use.
-
Click Projects. You will be redirected to the project board page. Here you will find your added project board. Click on the project board to open it.
-
Here your project board is open.
Complete demo (GIF)
